
- How to make the strongest, fail-proof animal glue!
- Clearing up doubts about the concentration and dissolving methods of glue!
Hello, I’m Satomi Fukamachi, a Japanese painter.
An indispensable item in Japanese painting is glue.
Without it, it might not even be an exaggeration to say that the work wouldn’t be considered a Japanese painting.
I’ve briefly touched on the use of glue in a previous article, but there’s still so much more to say about it.
In this approximately 10,000-word article, I will explain the profound world of glue!
Since the article is quite long, I recommend using the table of contents to navigate to the sections you’re interested in!
Click here to read the previous article!
➡JapanesePainting: Essential Items to Keep Glue Warm in Winter

➡Mastering Dosa Application: Kano School Techniques in Japanese Art!
Contents
- 1 What is Animal Glue (Nikawa) Used in Japanese Painting?
- 2 Types and Ingredients of Glue Used in Japanese Painting
- 3 Dissolving Japanese Painting Glue: The Method and Tools Needed
- 4 How to Dissolve Glue in Japanese Painting
- 5 Tips for Storing Japanese Painting Glue Water! [How to Make and Use Glue]
- 6 Summary of How to Make and Use Glue in Japanese Painting
- 7 【Japanese Painting Gofun】Translation of “Tansei Shinan” Instructions [Bonus]
- 8 References for Making Japanese Painting Glue Water
What is Animal Glue (Nikawa) Used in Japanese Painting?
Let’s first understand what animal glue (nikawa) is before diving into paint ingredients.
Do you know what tube paints, that you might have used before, are made of?
The answer is ‘pigment’ for color and ‘binder’ for dispersion.
Despite seeming complex, the main ingredients of paint are just these two!
Remember how tube watercolors come out thick and sticky?
That’s because pigments, like sand, are powdery and don’t stick to paper by themselves.
That’s where the binder comes in.
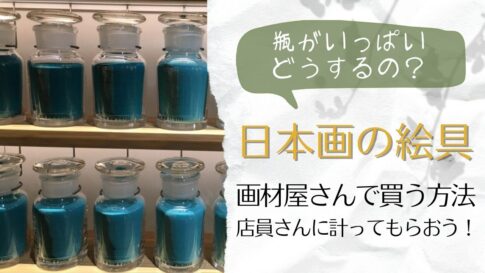
Below is a photo of the pigment used in Japanese painting, known as “iwa-enogu” (rock paint), showing powdery pigments stored in bottles.
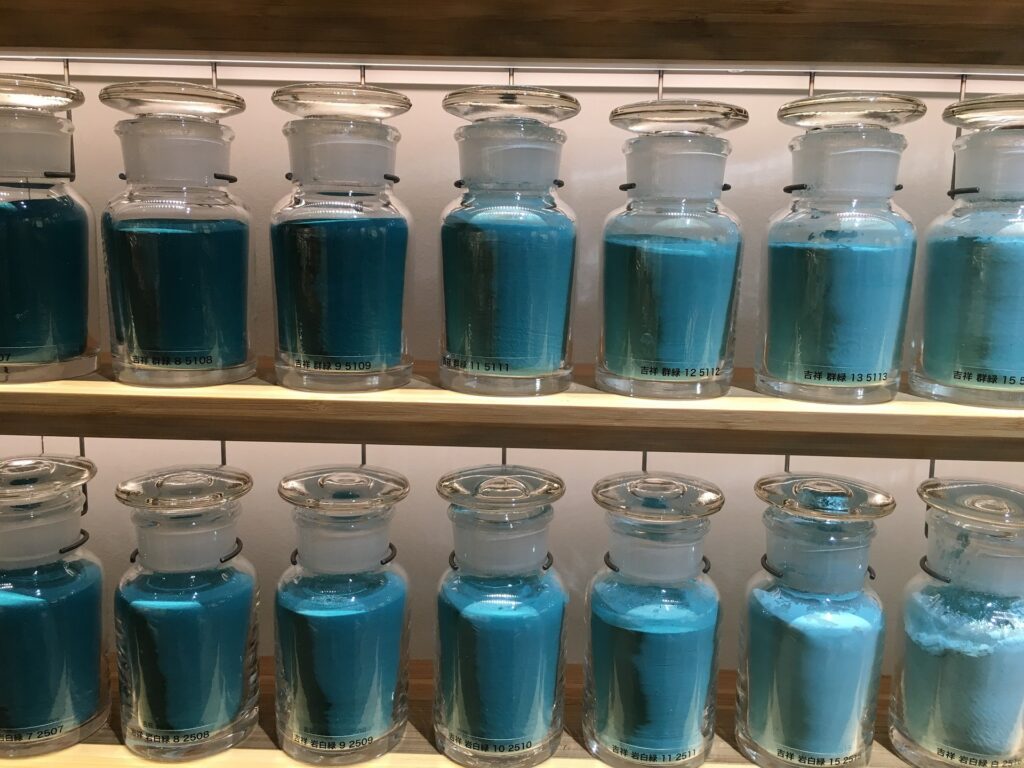
Binders are what allow these pigments to adhere to paper.
The type of binder used differs among Japanese painting, acrylics, and watercolors, changing the nature of the paint.
In the case of Japanese painting, the binder is animal glue.
So, what exactly is this “sticky binder”?
Let’s delve into the origin, the reason behind its stickiness, and the infamous belief that “glue is dangerous, smelly, and decays.”
Glue is an adhesive used to attach pigments to paper!
Types and Ingredients of Glue Used in Japanese Painting
You might have heard someone mistakenly call it “niwaka,” but the correct term is “nikawa.”
Keep this in mind.
Animal glue comes in various forms and ingredients.
The common complaints that “glue smells and decays” are due to its animal-based origins: skins, bones, intestines, and tendons of animals, boiled down to extract collagen, then solidified and dried.
It’s similar to aspic or gelatin – perishable and prone to decay. However, as I will explain later, proper handling can prevent decay.
Based on the animal source, glue can have different characteristics and forms, leading to a variety of types for different uses.
Let’s explore these types, starting with the most common one in Japanese painting.
Stick glue(三千本膠|SanzenbonNikawa)
Highly recommended for Japanese painting, this glue is mainly made from cowhide and tendons, following traditional methods.
Despite facing extinction several times, the technique has been preserved to date.
The method of making Sanzenbon Nikawa was lost around 2013, with the current version being a recreation of the original.
It’s unclear whether modern Sanzenbon Nikawa contains preservatives, unlike the old version that didn’t.
Origin of the Name “Sanzenbon”
A popular story suggests it’s because “one kanme (about 3.75 kg) can produce 3,000 sticks.”
However, contemporary Sanzenbon Nikawa weighs 10-13 g each.
If we were to make 3,000 sticks from one kanme, each would weigh only 1.25 g, which is too thin.
Therefore, Mr. Koji Ogawa in “Secrets of Japanese Painting Materials and Techniques” suggests alternative origins.
One theory is that one bale of raw materials can produce 3,000 sticks.
Another is based on the wooden box used in the production process, which can make 3,000 sticks.
Different stores offer varying explanations of the origin, making it interesting to compare.
I used to think it was from one cow.
Tsubu Nikawa (粒膠) / Pearl Glue
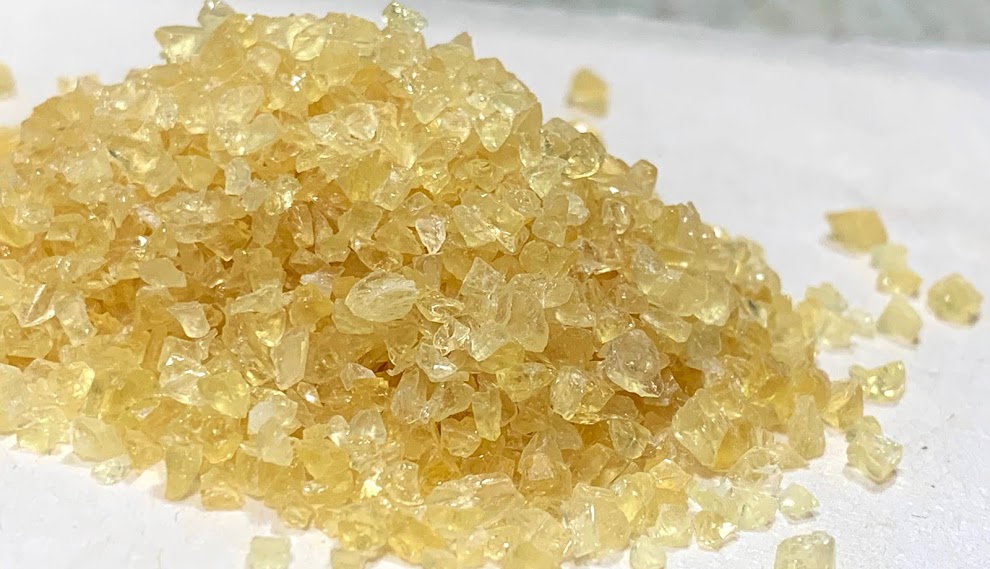
This is glue sold in granular form, also derived from cowhide, tendons, and bones, and contains preservatives.
According to “Illustrated Dictionary of Japanese Painting Terms,” it has fewer impurities than Sanzenbon Nikawa, stronger adhesion, and solidifies quickly. It sounds flawless at first glance.
However, this might refer to the discontinued “Pearl Glue.”
The currently available version, “Tsubu Nikawa,” started selling in 2007.
Unfortunately, it’s known among my peers for its weak adhesion.
“Secrets of Japanese Painting Materials and Techniques” also notes that its adhesive strength dramatically decreases at lower concentrations.
I stopped using it after a piece fell apart, but recently, I’ve been using “Banshu Tsubu Nikawa,” made a bit thicker than usual, without issues.
It reportedly doesn’t solidify as much on cold days.
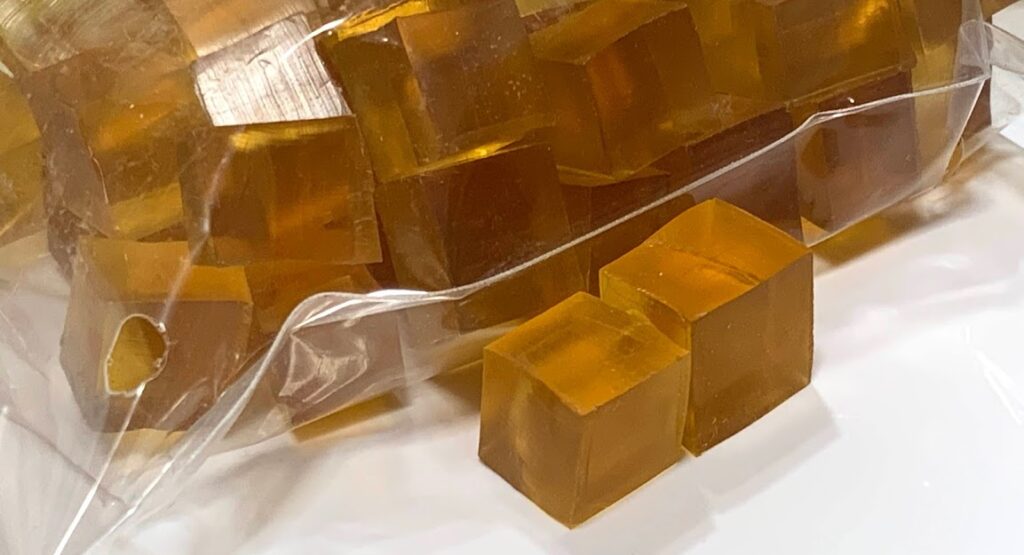
Deer Glue (Shika Nikawa|鹿膠)
Contrary to its name, it’s not made from deer but from cowhide, bones, and tendons, just like Sanzenbon Nikawa. “Deer Glue”(Shika-Nikawa) is a brand name.
In Japan, deer glue was traditionally regarded as a high-grade material, used in military gear and other applications.
However, the product named “Deer Glue” has been produced since the early Taisho period.
Its main feature is its stronger adhesive power compared to other glues, making it useful for enhancing the adhesive strength of Sanzenbon Nikawa or compensating for the weaker adhesion of Tsubu Nikawa.
It’s available in both liquid and cubical forms, with each cube weighing about 1 g.
board glue(Ita Nikawa|板膠)
Extracted by boiling the skin of cows and other animals, this glue is formed into a board-like shape. It’s known for its high adhesive power and transparency.
In the traditional Kano school’s Japanese painting manual “Tansei Shinan,” this type of glue was used.
fish glue(Nibe Nikawa|鰾膠)
Made from the swim bladders of fish like niben, this glue is also produced from sharks, carps, and eels.
Its strong adhesiveness is ideal for applying gold leaf.
The term “nibenikawa” can be confusing, as it’s used to refer to different things: the fish glue itself, the swim bladders (niben), the raw material for Sanzenbon Nikawa, or simply as another name for glue.
Note that Sanzenbon Nikawa’s raw material is different from nibenikawa.
Though fish glue is sometimes considered synonymous with nibenikawa, it usually refers to glue made from the swim bladders of black sea sturgeons.
rabbit glue(Usagi Nikawa|兎膠)
Primarily used in Western painting, rabbit glue is produced in France and employed in preparing canvas grounds for tempera and gesso painting.
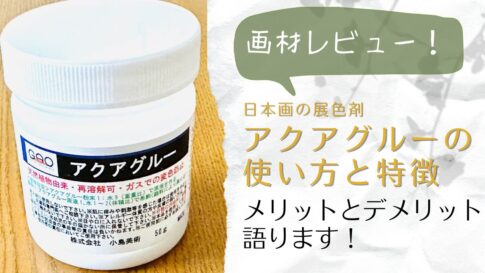
Resin-Based Glue
Sold under names like Art Resin or Art Glue, this is a non-animal-based glue.
Similar to acrylic paint, it’s water-resistant, meaning once the paint is applied, it can’t be washed off with water. Generally, the paint can’t be reused once dried.
Although the review of Art Glue is available in another article, some believe it might diminish the color quality of gofun (white pigment).
Its strong adhesive power makes it ideal for applying coarse pigments.
Despite the chemical connotation of “resin-based,” traditional glues like peach resin have been used in the past.
Despite the variety of animal glues, they all share a common feature: they degrade over time.
All types of glue lose their adhesive strength as they age and become difficult to dissolve after two years.
For long-term storage, keep them in a well-ventilated, cool, and dark place.
If you’re trying Japanese painting for the first time, using pre-dissolved glue is also recommended.
- The raw material of glue is mainly bovine collagen.
- Sanzen glue is the most major glue used in Japanese painting.
- Glue is solid. It is dissolved and used as glue water.
Dissolving Japanese Painting Glue: The Method and Tools Needed
Now, let’s gather the necessary tools for dissolving glue.
- A heater or other heating device (basically, hot water)
- A pot (a large heat-resistant container)
- A glue spoon (spoon or stirrer)
- A glue pot (heat-resistant jar)
- Gauze and a scale
At first glance, the list seems specialized, but household items can be used as substitutes. Remember, the key is to gently warm the glue in a water bath.
Let’s go through each tool and its recommended substitute.
Heating Device
Animal glue dissolves into a liquid state when heated, acting as an adhesive.
But direct heat is a no-no!
Just like dissolving gelatin, a slow water bath is necessary. Japanese painters commonly use electric heaters for this purpose.
Heat water in a pot using an electric heater, Put the glue pot with glue in it and boil the water.
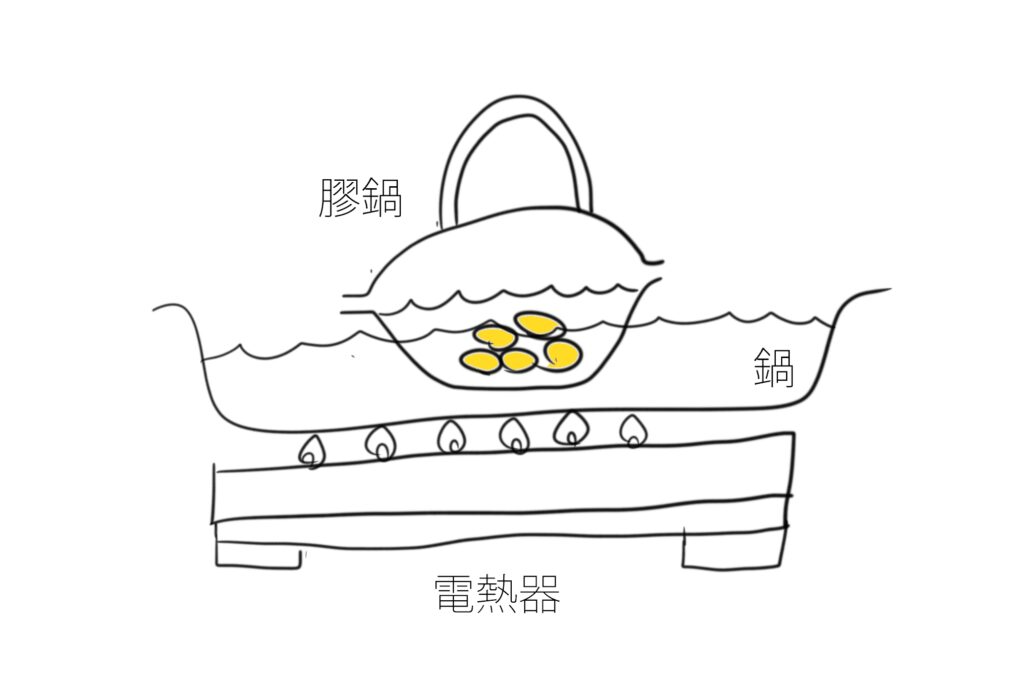
This way I can make hot water without having to go to the kitchen.
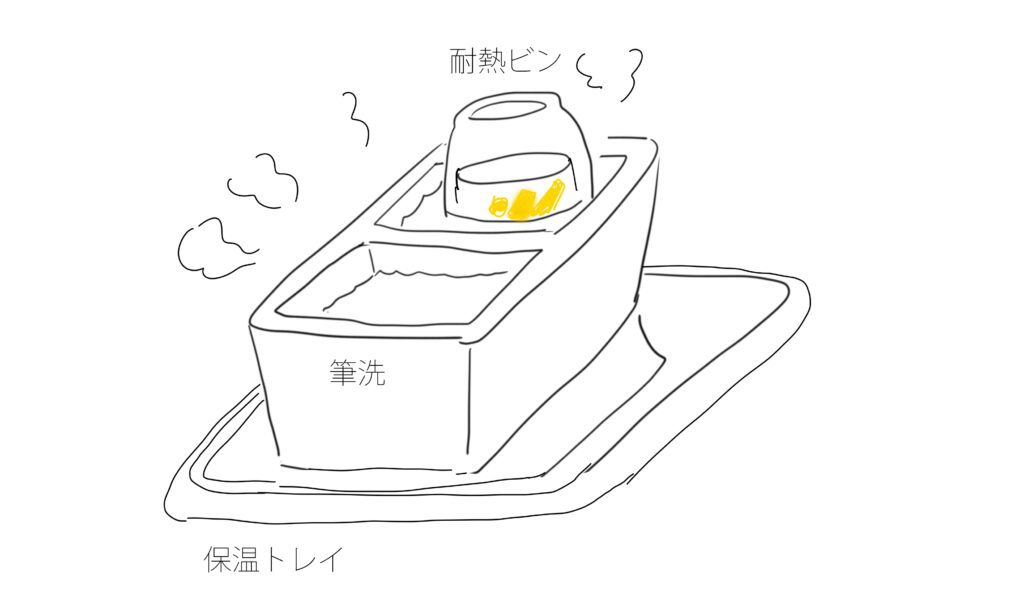
Other commonly used items are thermal trays made by Toshiba.
The author used to melt glue by replacing the boiling water in the heat-resistant bowl.
Now he uses a hot water heater.
pot

This is a container for the hot water used in the water bath.
It can be a large pot or a heat-resistant bowl.
If using a warming tray as a substitute for an electric heater, a ceramic brush washer can be used, but never a plastic one.

Glue Spoon (Nikawa Saji)
A spoon used to dissolve settled glue at the bottom of the container.
It’s also used to pour glue into paints.
Unlike regular spoons, it has a long handle and a curve.
I use a regular long spoon, preferably metal to avoid staining.
Glue Pot (Nikawa Nabe)
This earthenware pot resembles a clay pot rather than a typical pot.
Put glue and water in it for dissolving and storage.
It’s typically placed in a larger pot for water bath heating.
The earthenware pot slowly conducts heat, making it ideal for dissolving glue and maintaining warmth.
If it solidifies due to cold, this pot can be reheated multiple times without damage.
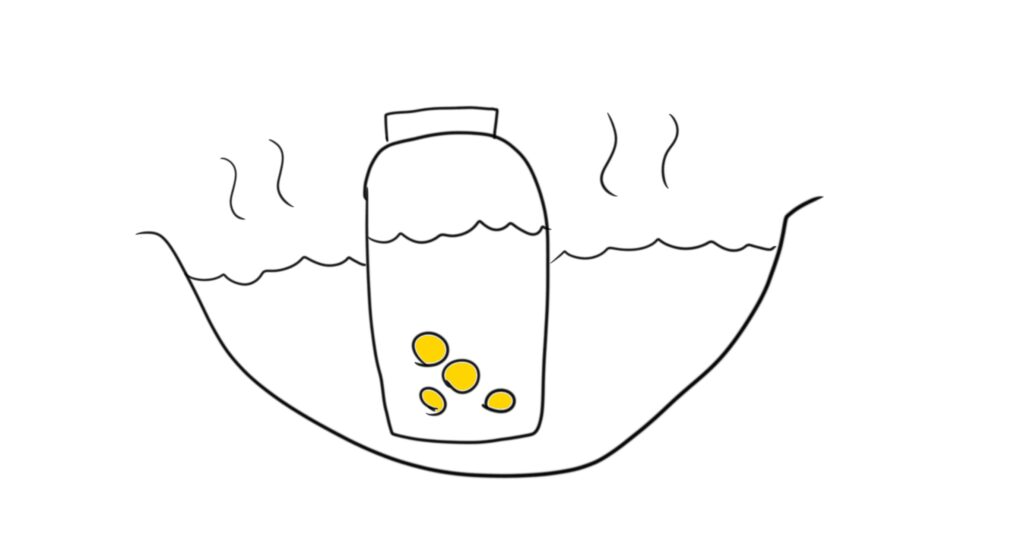
Heat-resistant glass jars are an alternative, but be cautious about temperature changes as they can break.
I once used a glass jar from a dollar store, and it broke due to the hot water.
Gauze and Scale
Common gauze and scales are fine.
Gauze is used for straining glue water.
Nylon stockings are considered optimal, but gauze is more accessible.
Some artists use tea strainers, but they must be fine-meshed.
The scale is needed for measuring the weight of granular glue, not necessary for Sanzenbon glue.
A measuring cup is essential for both types of glue to measure the water for dissolving.
While there are specialized tools, household items are sufficient substitutes. Prepare with what you have around!
How to Dissolve Glue in Japanese Painting
I touched on the method of dissolving glue in a previous article, but here, I will organize and detail the process step by step.
➡【初心者向け】日本画のドーサ液の引き方、作り方をイラスト付きで解説!
Those reading “Tansei Shinan” in modern translation can refer to this article to better understand the process.
Now, let’s revisit a topic we touched on earlier regarding the raw materials.
Do you remember the composition of glue?
Yes, it was collagen extracted from animal skins, among other sources.
Essentially, it’s a type of gelatin.
So, how do you dissolve gelatin when making jelly?
Do you know?
As mentioned during the discussion of tools, you must use a water bath.
Therefore, although it might be a bit repetitive, I will explain the procedure for using a water bath.
There are several important points to note, so please make sure to read through them before starting!
①First, you need to break down a stick of glue!
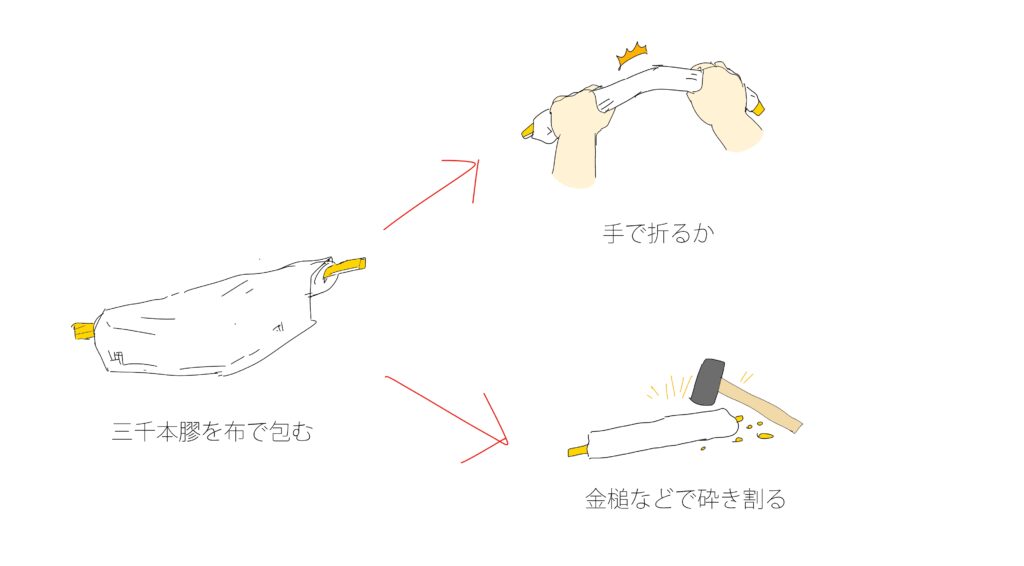
Sanzenbon glue is a hard, stick-like substance.
It takes a long time to dissolve in this form, so it’s better to break it into smaller pieces.
I usually wrap it in a cloth (like a towel) and break it by hand, but if you’re not confident in your strength, you can wrap it in a cloth and hit it with a hammer or put it in a plastic bag and cut it with nippers.
These methods are recommended to avoid injury.
When dissolving granular glue, measure a bit more than one stick of Sanzenbon glue, about 12–15g.
Using the same weight won’t stick properly, so it’s better to make a thicker solution initially.
Break one stick of Sanzenbon glue or measure 15g of granular glue!
If the humidity in your room exceeds 80% when you’re working, lower the humidity or change your location.
②Next, put the broken glue and water into a glue pot or heat-resistant jar.
Next, put the broken glue and water into a glue pot or heat-resistant jar.
However, achieving the right concentration of glue dissolved in water can be tricky, as it varies depending on the artist and the condition of the work.
Here are some examples
- 200cc of water for 2–3 sticks (Illustrated Japanese Painting Dictionary)
- 120–900cc of water for 3 sticks (Japanese Painting: Materials and Techniques)
- Generally, 70–100cc of water for 1 stick (Japanese Painting: Materials and Techniques)
- 200cc for 1 and a half sticks
- 50–100cc of water for 1 stick
Artists from Geidai (Tokyo University of the Arts) likely use 100cc of water per stick, making 200cc for 2 sticks.
Additionally, the adhesive strength changes with temperature and humidity.
In dry winters, it’s good to use 10% more water, and some suggest doing the same in summer.
Moreover, coarse-grain rock paints require a thicker glue, while finer ones need thinner glue.
A high concentration of glue can darken the color due to its yellowish hue.
Therefore, it’s common to start with a thicker glue to ensure the base paint adheres well to the paper and finish with a thinner glue for better color expression.
In summary, the advantages and disadvantages of glue concentration are
- Thick Glue – Advantage:Doesn’t peel off
Disadvantage: Poor color expression - Thin Glue – Advantage: Easy to peel off
Disadvantage: Better color expression
The concentration of glue can be complex. However, this level of detail is for those who have become accustomed and developed a sense for it.
・For beginners in Japanese painting, it’s recommended to start with fine-grain rock paint (11~white) and initially use 100cc of water for one stick of Sanzenbon glue
・In the final stages, use 200cc of water for one stick.
If the paint crumbles when touched, it indicates that the glue concentration is too low.
Try making a thicker glue with less water and try again.
Put the broken glue and 100cc of water into a heat-resistant jar.
[Aside] Is This Concentration Incorrect?
A junior of mine, who had studied Japanese painting in high school, encountered an interesting situation during their university Japanese painting classes.
They noticed that the glue concentration instructed in the university differed from what they had learned in high school.
This led them to exclaim:
“This concentration of glue is wrong! My high school teacher was a graduate of Tokyo University of the Arts! So, the method I am learning now at [this professor’s alma mater] University is incorrect!”
Is the concentration really wrong?
Well, let’s consider this.
As previously explained, the concentration of glue varies from artist to artist.
Furthermore, each artist uses rock paints with different particle sizes, employs different thicknesses in their painting, and even the intended aesthetic can vary.
Before an artist’s individual style, there are also variations in techniques and philosophies passed down through different painting schools or styles.
Consequently, it’s natural that the concentration of glue, which affects how the paint adheres, varies among artists.
It’s like comparing the art of ancient Egypt with that of ancient Mesopotamia and asking which is greater.
If you are learning Japanese painting from a teacher, it might be beneficial to ask about their roots or their mentor.
It can be enlightening for your own studies and can help you gain various perspectives.
③Soak the Glue!
When you first try slowly simmering glue in a water bath to make glue water, you might find yourself saying…
“It’s been 10, 20 minutes, and it’s still not dissolved!”
Yes, it can be frustrating for modern people, but transforming solid glue into glue water takes more than an hour.
But don’t give up!
Soaking the glue in water beforehand can significantly reduce the time required.
The best soaking time is around 6 hours.
Soaking for more than 10 hours can reduce the adhesive strength, so it’s a good idea to put it in water before going to bed and start dissolving it first thing in the morning.
Some books even suggest leaving it overnight.
If you feel 6 hours isn’t enough, adjust the soaking time to find what works best for you.
I’ve noticed that being overly meticulous about soaking time and doubts about the adhesive strength of new Sanzenbon glue can affect performance.
That’s why I prefer using Banshu granular glue, which requires less soaking time.
Leave the glue to soak for about 6 hours.
④ Dissolve the Glue in a Water Bath!
Once it’s soaked, all you have to do is simmer it in a water bath!
Place a pot with water on an electric heater, and put the glue pot or a heat-resistant jar in it to warm up.
But, remember never to let the water boil.
Glue has specific characteristics:
- It becomes harder to solidify above 80°C (it dries slower).
- Boiling reduces its adhesive strength.
For Japanese painting, the ideal water temperature is around 60°C to 70°C.
However, since many people don’t have a water thermometer, just remember
Above all, never let it boil!
Continuing with the topic of glue concentration, the water temperature also varies among artists and fields.
According to my internet research:
70℃ (for paintings)
60℃以上NG (for paintings)
80℃ (for violins)
60~70℃ (for violins)
75℃ (for pianos)
While there are slight differences, many technical books describe 60-70°C as the best temperature, so this blog adopts that range as the ideal.
If you’re using a warming tray instead of an electric heater, a heat-resistant bowl or a ceramic brush washer can also be used.
Some artists microwave the soaked glue for 30 seconds as a quicker and more convenient method.
However, “Japanese Painting: Materials and Techniques” states that this method results in weaker viscosity, so I don’t recommend it on this blog.
Simmer the heat-resistant glue in water just below boiling.
⑤Strain the Glue Water to Remove Impurities!
Finally, the glue has turned into a liquid, and we can now call it glue water! Great job!
However, there’s one last step left to create the strongest glue water.
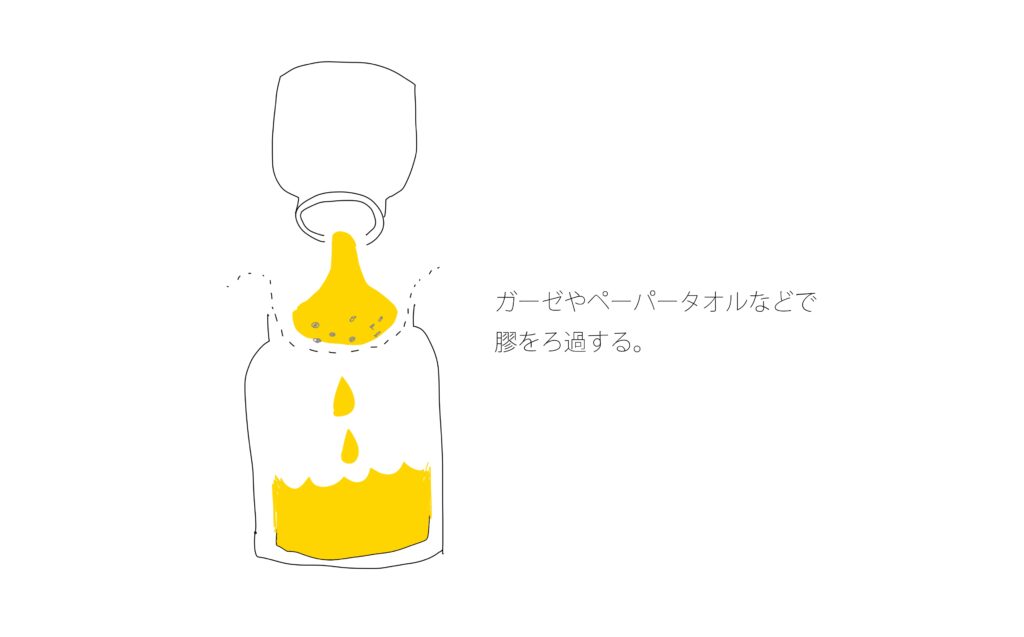
That step is filtration!
During its manufacturing, impurities can get mixed into the glue.
If not removed, these can cause the glue to spoil more quickly or prevent it from achieving the desired color.
So, let’s filter out these impurities.
Gauze, paper towels, and nylon stockings are commonly used for this purpose.
I often use gauze or paper towels.
After straining, return the glue water to a heat-resistant jar.
Strain the glue water and put it back into the heat-resistant jar.
Congratulations! Your glue water is now ready!!
Microwave Method for Dissolving Glue! [Updated 2022/03/12]
I heard that glue can also be dissolved in a microwave and decided to give it a try!
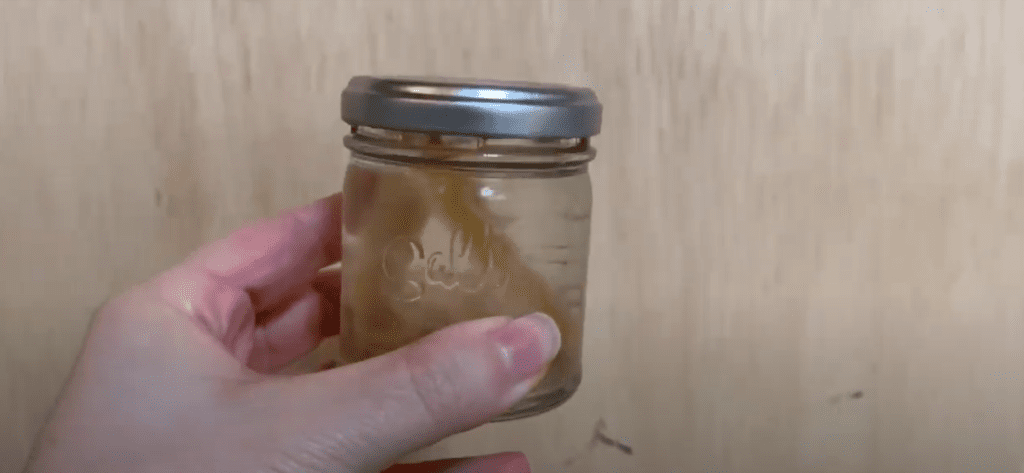
- Put the glue and water in a heat-resistant container and soak for a few hours.
- Then, microwave at 600W for 10 seconds at a time.
I believe the soaking time might differ between Sanzenbon and granular glue.
When I tried it, as shown in the photo above, the glue was soft enough to microwave.
Just 10 seconds of heating was enough to completely dissolve it.
However, there’s a theory that glue dissolved in a microwave might have slightly reduced adhesive strength.
Although it’s a method used in many art schools and should be fine, please be cautious if this concerns you.
Tips for Storing Japanese Painting Glue Water! [How to Make and Use Glue]
Use your finished glue water quickly!
Don’t save it for a week or a month as if it’s something precious.
Why? Because glue is perishable – it will spoil!
The shelf life is only three days in summer.
Even in winter, the limit is about one week to ten days.
As it gets older, the glue’s adhesive strength decreases before it starts to spoil.
If it no longer solidifies into a gel-like consistency at room temperature, consider it past its prime.
Remember to always store it in the refrigerator!
Freezing is a big no-no, as it destroys the collagen and thus, the adhesive power of the glue.
Chilled glue water turns into a jelly-like substance, which isn’t suitable for painting as is.
The same applies when it solidifies into a jelly-like state at room temperature in winter. Occasionally warm it up to keep it liquid before use.
Please refer to the following article for more information
➡【日本画】冬に固まる膠の保温に必携!便利アイテムを一挙紹介
Summary of How to Make and Use Glue in Japanese Painting

- Break a stick of Sanzenbon glue!
- Add it with 100cc of water in a heat-resistant jar!
- Simmer without boiling!
- Strain with gauze and put it back in the jar!
In summary, these five steps will allow you to make glue water.
Though the explanation got a bit complex along the way, starting by making it is the best approach.
Once you start noticing the differences in color and feel, revisit this explanation for a deeper understanding.
【Japanese Painting Gofun】Translation of “Tansei Shinan” Instructions [Bonus]
Now available as an eBook and paperback!
The original text is now available in book form!
The “Tansei Shinan,” a guide traditionally passed down through generations of the Kano school, also contains instructions on making and using Japanese painting gofun (white pigment).
I have translated these passages into modern language, so please use the knowledge from this article as you recall and apply these instructions!
Using Glue in Japanese Painting
The properties and methods of dissolving glue have been previously discussed in the section on dosa, so I will not repeat them here.
※ Please refer to the previous article for more information ↓
➡Mastering Dosa Application: Kano School Techniques in Japanese Art!
The concentration of glue used in paints remains consistent throughout the year.
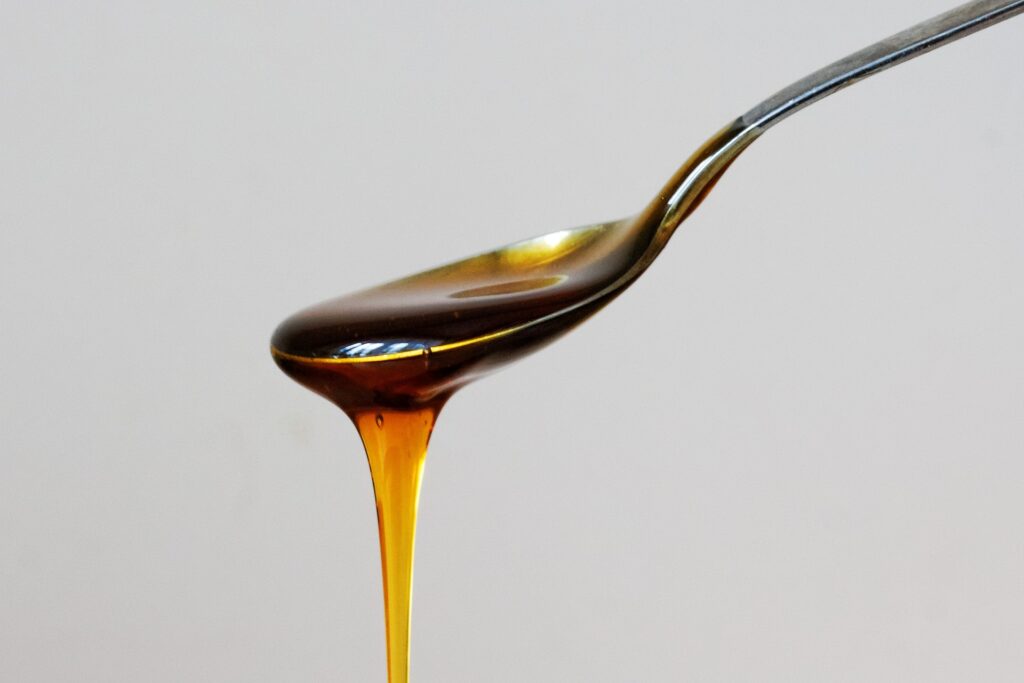
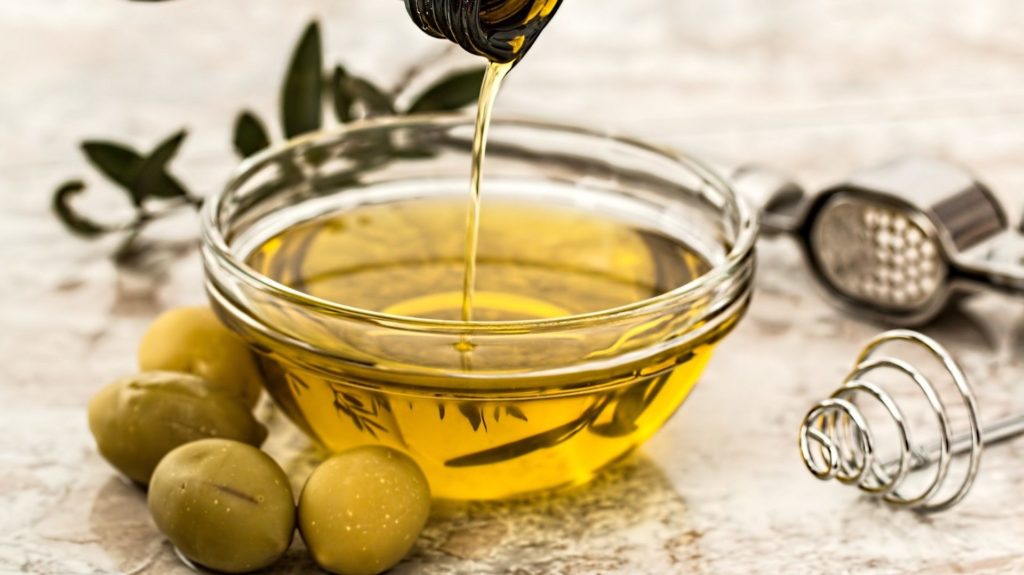
First, pour about 180ml (one gō) of boiling water over a sheet of board glue and boil it until it dissolves into a thick, oil-like consistency.
From mid-September (mid-autumn) to early summer of the following year, the glue solution should be dissolved thickly, resembling the consistency of aspic.
However, while boiling the glue, a metal pot is fine, but after dissolving, it’s better to use an earthenware pot.
This is because, if the glue solidifies due to cold, the earthenware pot can be reheated several times directly over the fire without breaking and without producing steam.
Also, be careful not to add even a little bit of alum to this glue solution.
※ 1 Consistent throughout the seasons, 2 To prevent the release of steam,
References for Making Japanese Painting Glue Water
How to draw analog illustrations!


How to Paint Japanese Paintings


Click here to read the previous article.
➡JapanesePainting: Essential Items to Keep Glue Warm in Winter